How to make buttons at The Regional Assembly of Text on Main
Pontifications
Major kudos to The Regional Assembly of text folks on Main Street for making it so easy and being so patient with my silly unencumbered by graphical knowledge common sense :-) questions
- Read their button making FAQ and directions
- Download one of their button templates ( they have 4 sizes, I downloaded the 2.25 inch template
- Open the template in Photoshop (should work in other programs like GIMP or even Pages or Preview but I only tried Photoshop)
- Drag your button graphic (a circle shaped graphic that fits inside a 180 x 180 px square graphic seems to work for 2.25 inch, here’s the Martin Luther King graphic i used) into one of the circular spots on the template. Change the opacity (each dragged graphic creates a layer) of the layer to 90% in order to see if you have dragged it to the right position.
- Repeat above 11 times since there are 12 circles per sheet in the 2.25 inch template
- Create a PNG (here’s my PNG with 12 MLK buttons)
- Print onto normal paper as many copies of the PNG as you need (3 copies x 12 = 36 possible buttons but you of course can do whoever many you need, we did 30 buttons so needed 3 copies of the PNG)
- Take the 3 sheets to The Regional Assembly of Text and they’ll show you how to use their circle cutting machine and button making machine and in < 1 hour you will have 30 buttons)! Easy! and 70 cents a button in quantities of 30 ore more
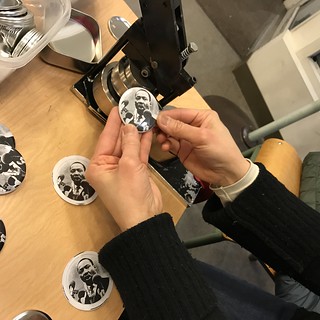
- Here is what it looks like: